This post is an extension of a previous post about creating and using Key Performance Indicators (KPIs) in a SharePoint library, based on a calculated column. The follow-up question is, “Can I use InfoPath to set KPIs in SharePoint?”
The answer is “Yes, but... it takes a little bit of work.”
The problem is that neither SharePoint nor InfoPath is set up to enable users to simply click a couple of buttons and make KPIs magically work. (Sometimes, a calculated column can be a better choice. Read about that solution here.)
We can work around this deficiency, though, by:
- creating a SharePoint column to display pictures
- finding or uploading KPIs we want to use
- creating an InfoPath field to store a link to our KPIs
- promoting the InfoPath field to the SharePoint column
In this post, we will use SharePoint 2010 Enterprise and InfoPath 2010, but it should work the same way with SharePoint and InfoPath 2013.
1. Create an imitation KPI column
In the form library in which we want to have KPIs, we will create a metadata column of type “Hyperlink or Picture” and make sure to set the “Format URL as:” option to Picture.

That’s all it takes to set up our column properly.
2. Upload KPI images
The column we use will display an image from a URL. We need to upload some images that we can use for KPIs, and it just happens that I have some little red, green, and yellow sphere-like images laying around. They can be uploaded to any Library, but I recommend using a Site Asset Library for added functionality. This Library will require read permissions for anyone trying to view the KPIs. (The KPIs do not have to be stored in the same site as the Library that will use them.)

We need to click on each one of these items to get the URL of each individual image. This URL will be used in our form later.

Another option is to use the default visuals that come with every SharePoint site at the location of (SharePoint URL)/_layouts/images/. For those using SharePoint 2013, these visuals can be found at (SharePoint URL)/_layouts/15/images/. Here is a site that has listings of most of the major default icons found in SharePoint.
3. Create an InfoPath Field to Set the KPI
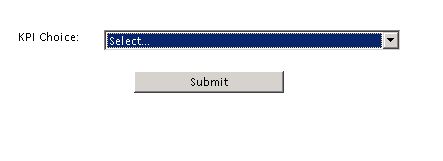
Here’s where the magic happens. We’ll need to set up a form where a condition will set the field for our KPI. In this example, our form will just have a dropdown list with three options. In the actual data source, we will have two fields: one for the selection dropdown (KPIChoice) and one for the KPI URL value (KPIused).

The values for the list dropdown are as follows:

We will then set an Action Rule on the KPI Choice field to set the KPIused field. This example assumes that we have direct choice of the KPI, but this could be modified so that any condition could be checked and used to set the KPIused field. The Action Rule will be the set to trigger any time the field changes, with no condition specified, so that it always runs and the action will be to set a field’s value. This is the formula used to set the value of the KPIused field:

This formula will concatenate the rest of the URL (taken from the uploaded items earlier) along with the color that we select from the dropdown.
4. Connecting It All Together
For this last piece, we are going to publish the InfoPath form to my Library (File > Publish > SharePoint Server). During the publishing process, we will promote the KPIused field to the KPI column that we created so that the value will automatically be visible in a SharePoint library view.

In theory, those are the only steps required to get this to work. For demonstration purposes, we’re going to add a submit button to make saving to the Library easier.
This yields the following results:

This is a fairly high level overview of how the process works, and it assumes that readers have basic understanding of, and familiarity with, InfoPath and SharePoint Workflows. For those interested in learning more about digital forms and SharePoint Workflows, we have two courses available depending on which version of SharePoint an organization is using.
For SharePoint 2010: InfoPath 2010 and SharePoint Server 2010 No-Code Workflow Deep Dive
For SharePoint 2013: SharePoint 2013 Workflow and InfoPath No-Code Development
Both courses are available to attend in the PremierPoint Solutions Nashville classroom or Live Online from anywhere that has an Internet connection.
No comments:
Post a Comment